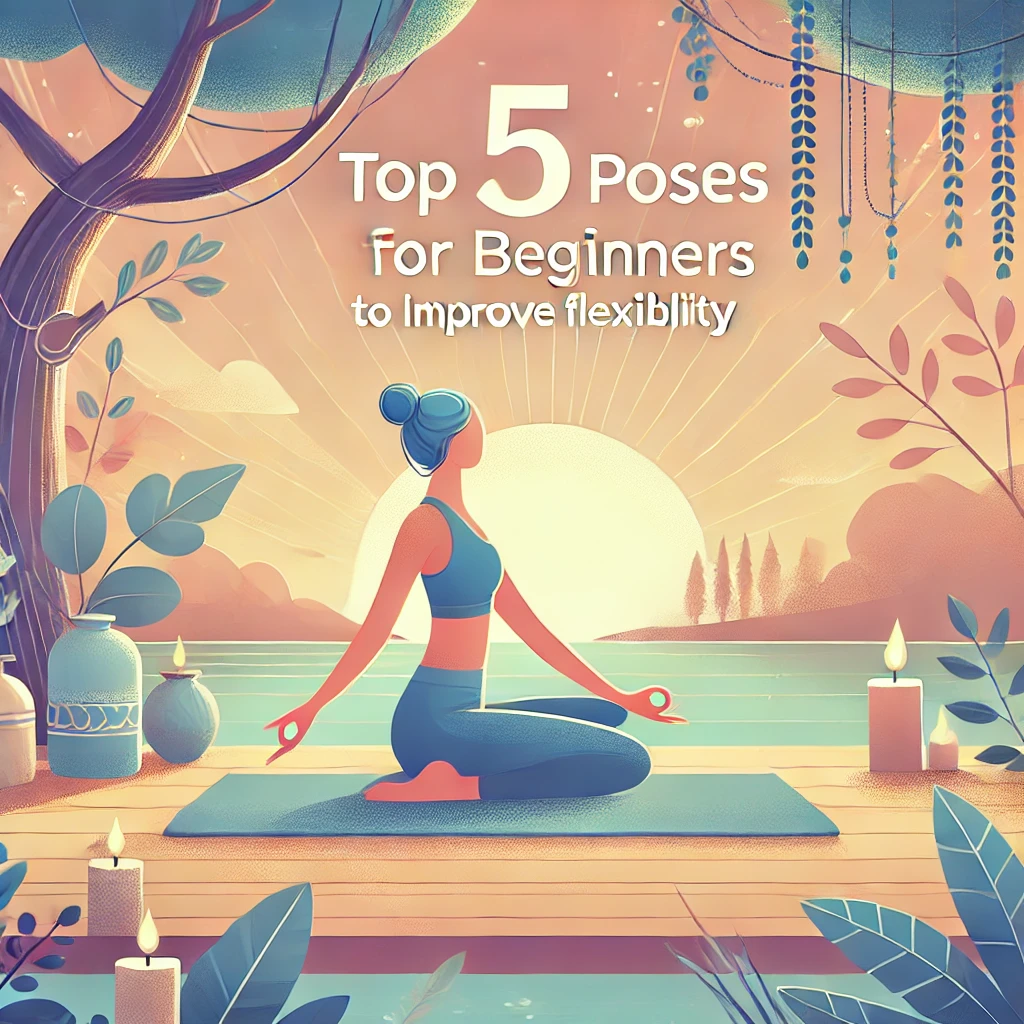
Did you know that over 300 million people practice yoga worldwide? Yoga is not just about relaxation; it’s a powerful way to enhance flexibility, strength, and overall well-being. For beginners, one of the biggest challenges is stiffness—whether it’s tight hamstrings, a rigid spine, or limited hip mobility.
The good news? You don’t need to be flexible to start yoga! In fact, yoga is one of the best ways to improve flexibility gradually. Whether you’re looking to ease muscle stiffness, enhance mobility, or simply feel more agile in daily life, incorporating simple yoga poses can make a huge difference.
In this article, we’ll explore the top five beginner-friendly yoga poses that will help you improve flexibility. These poses are easy to perform, require no special equipment, and can be done from the comfort of your home.
1. Downward-Facing Dog (Adho Mukha Svanasana)
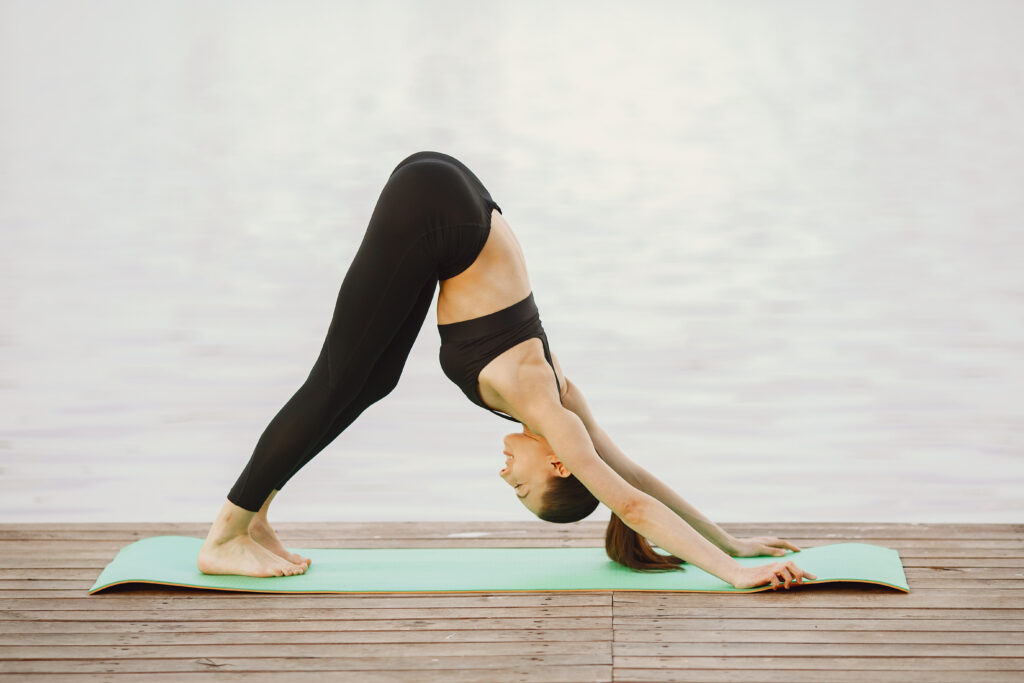
One of the most popular yoga poses, Downward-Facing Dog is a full-body stretch that improves flexibility in the hamstrings, calves, shoulders, and spine.
Benefits:
✔ Stretches the hamstrings, calves, and spine.
✔ Strengthens arms, shoulders, and legs.
✔ Improves posture and blood circulation.
How to Do It:
- Start on all fours with your hands shoulder-width apart and knees hip-width apart.
- Tuck your toes under and lift your hips towards the ceiling, straightening your legs.
- Keep your hands and feet firmly planted on the ground, forming an inverted “V” shape.
- Let your head relax between your arms and hold for 30 seconds to 1 minute.
- To release, slowly lower your knees back to the ground.
Modifications for Beginners:
- If your hamstrings feel too tight, bend your knees slightly to maintain a straight spine.
- Place a yoga block under your hands if reaching the floor is difficult.
Common Mistakes to Avoid:
🚫 Rounding the back instead of lengthening the spine.
🚫 Placing too much weight on the hands instead of evenly distributing it.
2. Cobra Pose (Bhujangasana)

The Cobra Pose is a gentle backbend that opens the chest, strengthens the spine, and enhances lower back flexibility.
Benefits:
✔ Stretches the chest, shoulders, and abdomen.
✔ Strengthens the spine and relieves back pain.
✔ Improves flexibility in the lower back.
How to Do It:
- Lie flat on your stomach with your legs extended and hands placed under your shoulders.
- Press your palms into the mat and gently lift your chest while keeping your elbows slightly bent.
- Keep your shoulders relaxed and look slightly upward.
- Hold for 20–30 seconds, then lower back down.
Modifications for Beginners:
- If you feel strain in your lower back, keep your elbows bent and stay in a low Cobra pose.
- Place a rolled-up towel under your hips for extra support.
Precautions:
🚫 Avoid if you have recent back injuries or severe lower back pain.
3. Seated Forward Bend (Paschimottanasana)
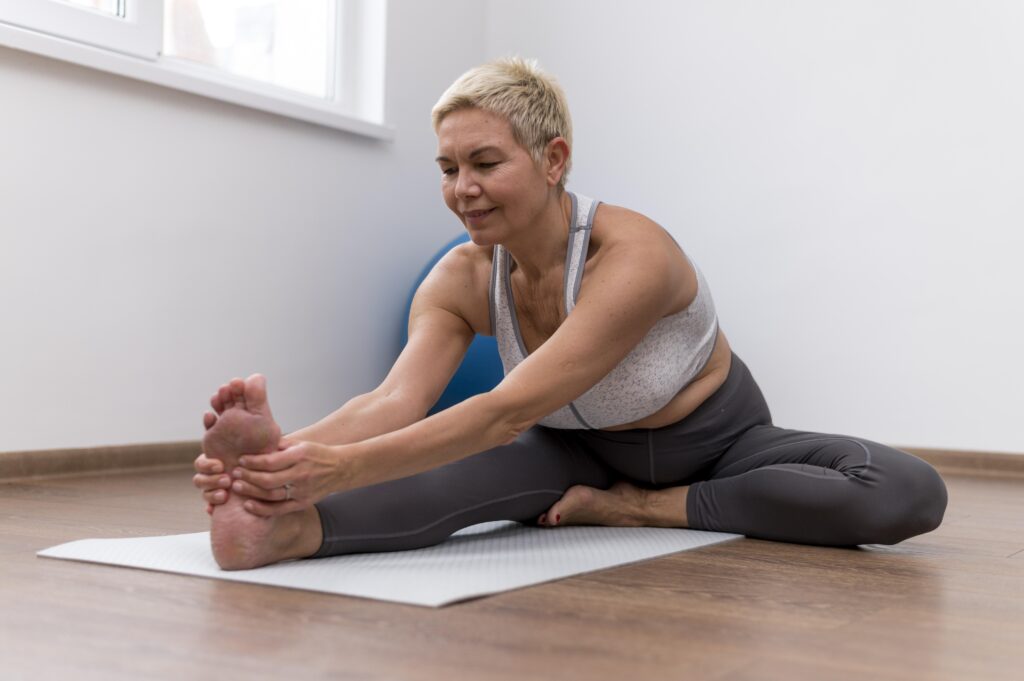
The Seated Forward Bend is a simple yet powerful pose that stretches the entire back, hamstrings, and calves, helping to relieve stiffness.
Benefits:
✔ Stretches the spine, hamstrings, and lower back.
✔ Improves digestion and calms the nervous system.
✔ Helps relieve stress and anxiety.
How to Do It:
- Sit on the floor with your legs extended straight in front of you.
- Keep your back straight and inhale deeply.
- As you exhale, slowly bend forward from the hips, reaching for your feet.
- Keep your knees slightly bent if needed to avoid strain.
- Hold the pose for 20–30 seconds, then slowly return to the sitting position.
Modifications for Beginners:
- Use a yoga strap around your feet if you can’t reach your toes.
- Keep a slight bend in your knees to avoid overstraining your hamstrings.
Common Concerns:
🚫 Avoid bouncing while bending forward to prevent muscle strain.
🚫 Keep your spine long instead of rounding your back.
4. Butterfly Pose (Baddha Konasana)
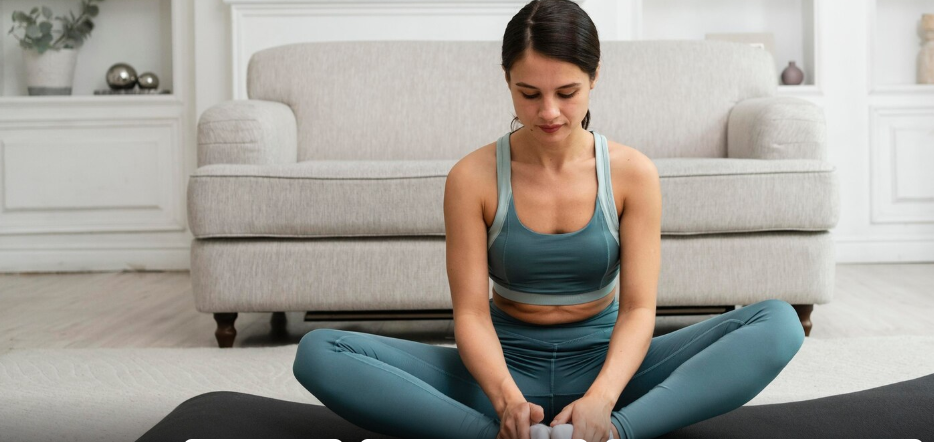
The Butterfly Pose is great for hip flexibility, making it ideal for beginners with tight hips and thighs.
Benefits:
✔ Opens up the hips and groin area.
✔ Improves blood circulation in the lower body.
✔ Reduces stiffness in the knees and inner thighs.
How to Do It:
- Sit on the floor with your knees bent and the soles of your feet touching.
- Hold your feet with your hands and keep your back straight.
- Gently press your knees toward the floor for a deeper stretch.
- Hold for 30 seconds to 1 minute, breathing deeply.
Variations for Beginners:
- Sit on a folded blanket to elevate the hips if sitting upright is difficult.
- Instead of pressing your knees down, simply focus on relaxing them naturally.
Why It’s Great for Beginners:
- Low risk of injury.
- Can be performed as a cool-down pose after a workout or yoga session.
5. Cat-Cow Pose (Marjaryasana-Bitilasana)
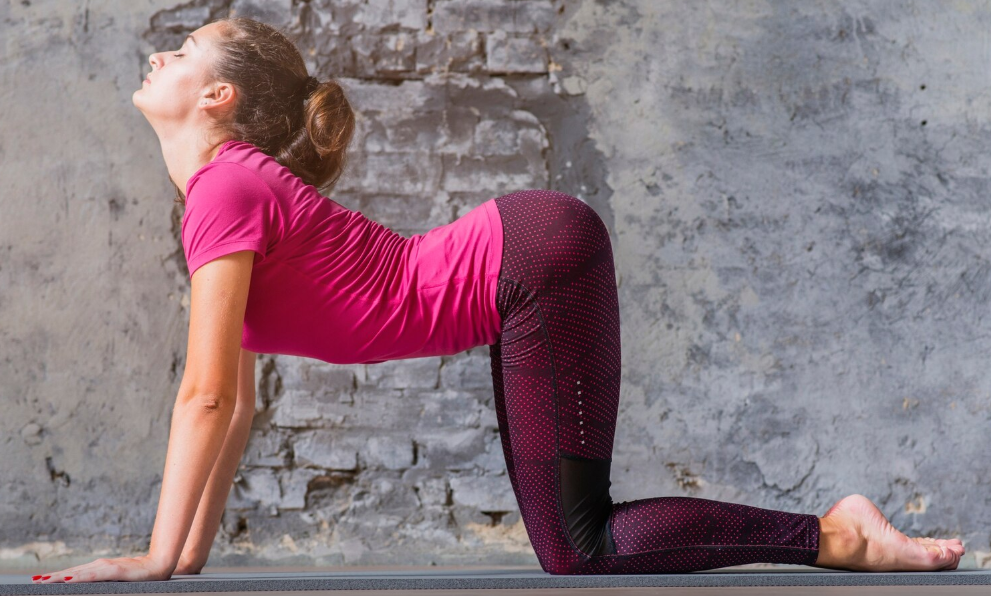
The Cat-Cow Pose is a gentle spinal movement that improves flexibility and warms up the back muscles.
Benefits:
✔ Increases spinal flexibility and mobility.
✔ Reduces stiffness in the neck, shoulders, and lower back.
✔ Enhances coordination and posture.
How to Do It:
- Start on all fours with your wrists aligned under your shoulders and knees under your hips.
- Inhale: Arch your back, lift your head, and tilt your tailbone upward (Cow Pose).
- Exhale: Round your spine, tuck your chin, and pull your belly toward your spine (Cat Pose).
- Repeat the movement 10–15 times, flowing with your breath.
Common Mistakes to Avoid:
🚫 Moving too quickly—focus on slow, controlled movements.
🚫 Collapsing the shoulders instead of keeping them engaged.
Additional Tips for Improving Flexibility
Practicing yoga poses is a great way to improve flexibility, but for the best results, you should incorporate other healthy habits into your routine. Here are some expert-backed tips to maximize your flexibility gains:
1. Practice Regularly
- Consistency is key! Aim to practice at least 3–4 times a week for noticeable improvements.
- Even 10–15 minutes a day can make a difference over time.
2. Warm Up Before Stretching
- Cold muscles are more prone to injury, so start with light movements like arm circles, leg swings, or a few rounds of Sun Salutations before deep stretching.
3. Hold Poses for Longer
- The longer you hold a stretch, the better it works. Try staying in each pose for at least 30 seconds to 1 minute to allow your muscles to release tension.
- Use deep breathing to relax and stretch further.
4. Stay Hydrated
- Drinking enough water helps keep your muscles and joints lubricated, making it easier to stretch.
- Dehydration can tighten muscles and make them more prone to stiffness.
5. Listen to Your Body
- Never force a stretch. If a pose feels painful, ease out of it and modify it as needed.
- Flexibility takes time, so be patient with yourself!
6. Complement Yoga with Other Activities
- Try foam rolling or dynamic stretching before yoga to loosen up tight muscles.
- Strength training can also support flexibility by improving muscle balance.
Common Questions About Yoga and Flexibility
1. How long does it take to improve flexibility with yoga?
It depends on consistency! Many people notice progress within 4–6 weeks of regular practice. However, results vary based on age, body type, and starting flexibility.
2. Can I do these yoga poses every day?
Yes! These poses are safe for daily practice and can help maintain flexibility. Just listen to your body and rest if you feel sore.
3. Is yoga enough for flexibility, or do I need other exercises?
Yoga is excellent for flexibility, but combining it with mobility drills and strength training can enhance results even further.
Conclusion: Take Your First Step Toward Flexibility!
Improving flexibility isn’t about how far you can stretch—it’s about feeling better in your body. Whether you’re a total beginner or just looking to improve mobility, these five yoga poses are a great starting point.
✅ Try these poses daily.
✅ Be patient with your progress.
✅ Enjoy the journey to a more flexible, pain-free body!
Ready to begin? Roll out your yoga mat and give these poses a try! Let us know in the comments which one worked best for you. 🙏✨